
Appendix
Opkg Basics

Opkg (Open PacKaGe Management) is a lightweight package management system. It is written in C and resembles apt/dpkg in operation. It is intended for use on embedded Linux devices and is used in this capacity in the OpenEmbedded and OpenWrt projects.
opkg list-installed command to know what packages are installed on the file system. For example use this command with grep:
opkg list-installed | grep -i name_packet
opkg search name_packet show where are the files installed of the packet
opkg whatdepends name_packet show what packets depend on the “name_packet” package
opkg remove name_packet remove packages, there are important options:
- -force-depends This option will force the removal of the package but will leave any packages that depend on this package installed
- -force-removal-of-dependent-packages This option will go up the dependency list and remove all packages in the dependency chain
opkg install name_packet install the packages
How to confgure a new project in CCS
Launch Code Composer Studio (aka CCS) using the icon on desktop of your Ubuntu Linux host.
When prompted for the workspace, keep the default one.
Enabling CCS Capabilities
Because we used a new workspace, capabilities need to be enabled to make perspectives selectable in the Window → Open Perspectives list.
After opening CCS with a new workspace:
- Open the Window → Preferences dialog box
- Go to the General → Capabilities dialog box.
- Click Enable All button. The result is shown below.
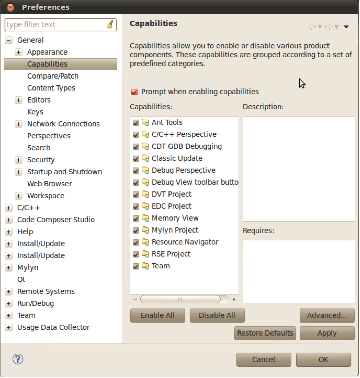
This enables all the perspectives in the Window → Open Perspectives → Dialog as shown below.
This is needed to make the C/C++ and Remote System Explorer plug-ins selectable.
Click on “Apply” then “OK”.
Toolchain configuration in CCS
Now let’s create Linux GCC project in CCSv5.
We need first to configure CCS to use the Arm Arago GCC toolchain which has been installed with the SDK, otherwise our project type would use the generic GCC compiler.
All target-related options, typically used for ARM cross-compile (-march=armv7-a, -mtune=cortex-a8 and others), must be specified in the build options before building the project.
We will use the Arago cross-compiler tools instead of the default gcc. The Arago binaries have a prefix that designates the target and the type of output binary format (something like arm-arago-linux-gnueabi-g++).
Go to Window → Preferences → Code Composer Studio → Build → Compilers.
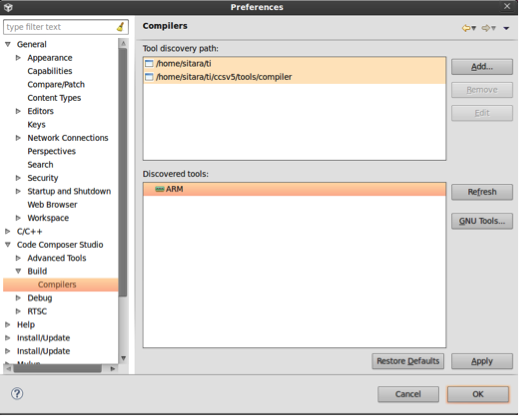
In the Discovered tools section, click on “ARM” then “GNU Tools”
Select Edit
In the Tool installation directory, type the following:
home/pengwyn/ti-sdk-am335x-evm-05.06.00.00/linux-devkit/arm-arago-linux-gnueabi
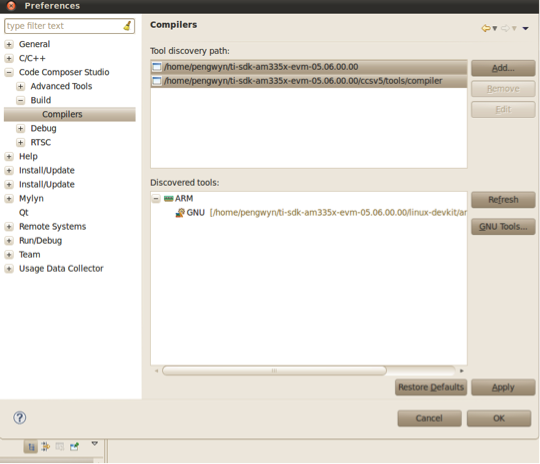
Then click in any of the below empty boxes; the relative path will get filled in automatically as shown below. Leave the default and click on OK.
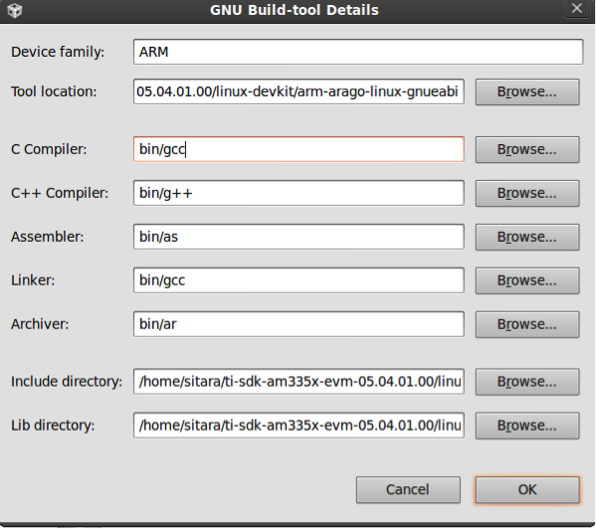
Click on OK again to confirm the GNU Build-Tool settings.
Go back to the Preferences window, click on Apply and then OK.
Starting your project
Select File → New → Project→Code Composer Studio →CCS project.
Type in my_Hello as project name.
Output type: Executable.
Change the ARM variant to Generic Cortex-A8 device.
Use the Basic Examples → Hello World project template.
Click Finish.

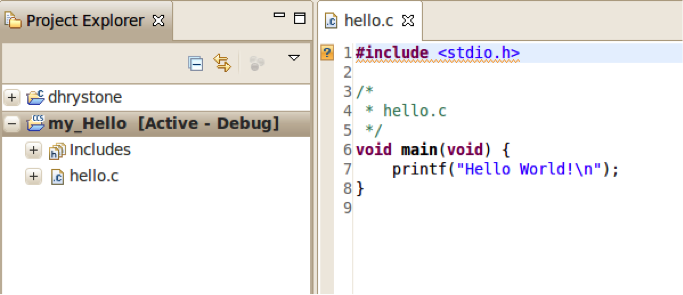
The my_Hello project will be created in your CCS workspace and added to the Project Explorer window (note that it is in bold letters, meaning this is the active project).
Note
You can also add source files to the project by R-click on project and selecting “Add Files”.
Build your project
R-click on project name in CCS Project Explorer and select window → Build project.
Check the console view for successful build…The executable program my_Hello.exe will be created.
Now you need to copy it to the target filesystem.
Go to Window → Open Perspective → Other... → Remote System Explorer to open the Remote System Explorer perspective.
Now you need to establish a new connection with the Pengwyn.
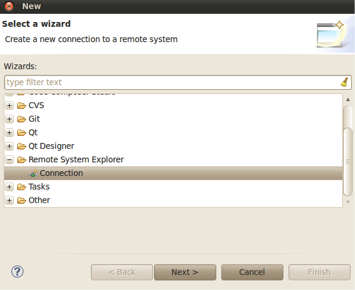
For that you must run the New Connection Wizard. To open this, click on File → New → Other menu item.
In the dialog below, expand the Remote System Explorer folder, click on Connection and Next.
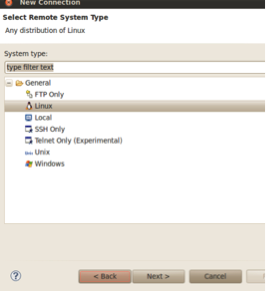
Select the Linux system type and click Next.
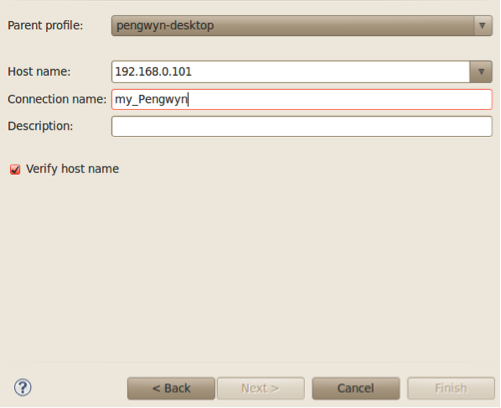
Next to “Host name” enter the IP address of your Pengwyn: 192.168.0.101
Use “my_pengwyn” as Connection name. Click on Next.
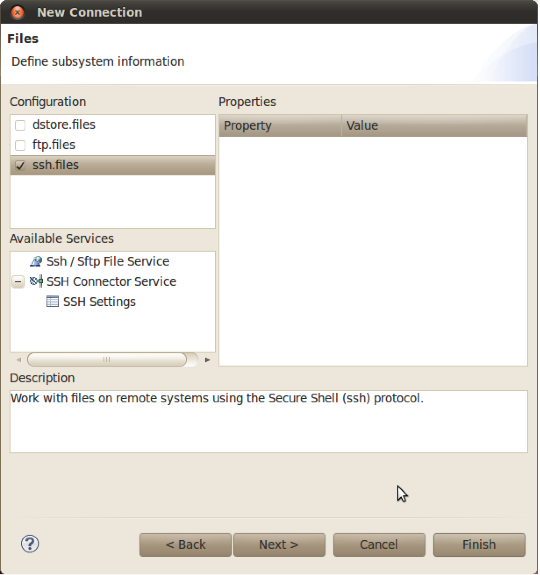
Check ssh.files and click Next.
Check processes.shell.linux and click Next.

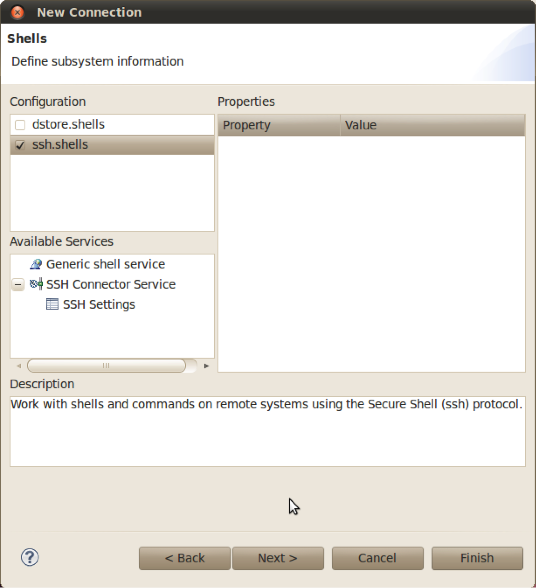
Check ssh.shells and click Next.
Check ssh.terminals and click Finish to complete the wizard.

Opening the Remote System Explorer View
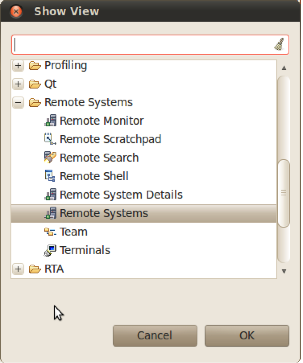
In CCSv5 click the Window → Show View → Other menu item. In the Show View dialog select Remote Systems → Remote Systems then OK.
This adds the Remote Systems view to the current perspective.
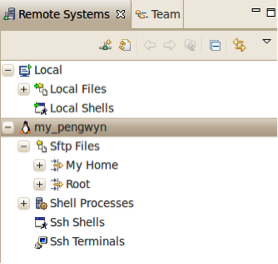
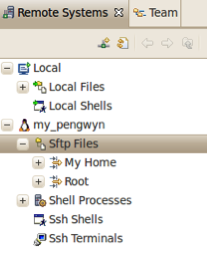
A Remote Systems panel appears in the CCS perspective. After a R-click → Detach on the Remote Systems panel and moving it to the left side of the screen the CCS window will look like the screen capture below. The target connection named My_Pengwyn is shown as a tree structure with branches for the various Remote System functions. Communication with the target EVM uses a secure SSH connection.
- Sftp Files - Provides a drag and drop GUI interface to the target file system.
- Shell Processes - Provides a listing of processes running on the remote system and allows processes to be remotely killed.
- Ssh Shells - Provides a Linux shell window for the remote system within CCS.
- Ssh Terminals - Provides a terminal window for the remote system within CCS.
Configuring the Target Pengwyn Connection
After the New Connection Wizard has been completed and the Remote System Explorer view has been opened, the new connection must be configured to communicate with the target EVM.
R-click on the my_pengwyn node and select Properties from the context menu.
After the Properties window opens, click on Host. Change the Default User ID to root and click OK.

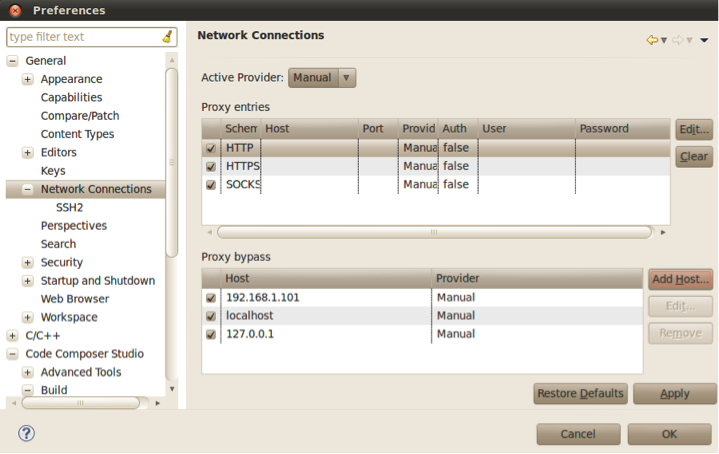
Click the Window → Preferences menu item. Go to General → Network Connections
In the bottom part of the dialog box, in the Proxy Bypass section, click Add Host..., and add the IP address of target board (192.168.0.101) and click Apply then OK.
The Remote System Explorer is now ready for use.
The first time the target EVM file system is booted a private key and a public key is created in the target file system. Before connecting to the target EVM the first time, the public key must be exported from the target EVM to the Linux host system.
To open the SSH connection, expand the ROOT node under the Sftp node.
When prompted for the password, click OK (no password).
A warning dialog box will appear: click Yes, and the public key will be exported to the Ubuntu host.